> ## Documentation Index
> Fetch the complete documentation index at: https://docs.dume.ai/llms.txt
> Use this file to discover all available pages before exploring further.
# LinkedIn Post Generator
> This comprehensive tutorial will guide you through building an automated LinkedIn post creation workflow using Dume AI. The workflow will generate engaging hooks, compelling content, relevant hashtags, and publish directly to LinkedIn.
## Prerequisites: Setting Up LinkedIn MCP Server
Before creating your workflow, you need to connect your LinkedIn account through an MCP server.
### Step 1: Configure LinkedIn MCP Server
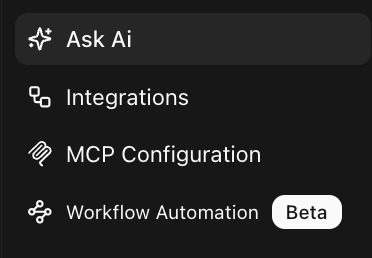
1. **Navigate to MCP Settings**: Go to your Dume AI menu and locate the MCP Server section
2. **Add LinkedIn Integration**: Follow the detailed setup instructions at [https://docs.dume.ai/mcp\_server](https://docs.dume.ai/mcp_server) to connect LinkdIn MCP remote server from Composio.
3. **Authenticate Your Account**: Complete the OAuth flow to connect your LinkedIn profile
4. **Test Connection**: Verify that the LinkedIn MCP server is properly connected and accessible
Once your LinkedIn MCP server is configured, you're ready to build the workflow.
## Building the LinkedIn Post Workflow
### Step 2: Create the Input Node
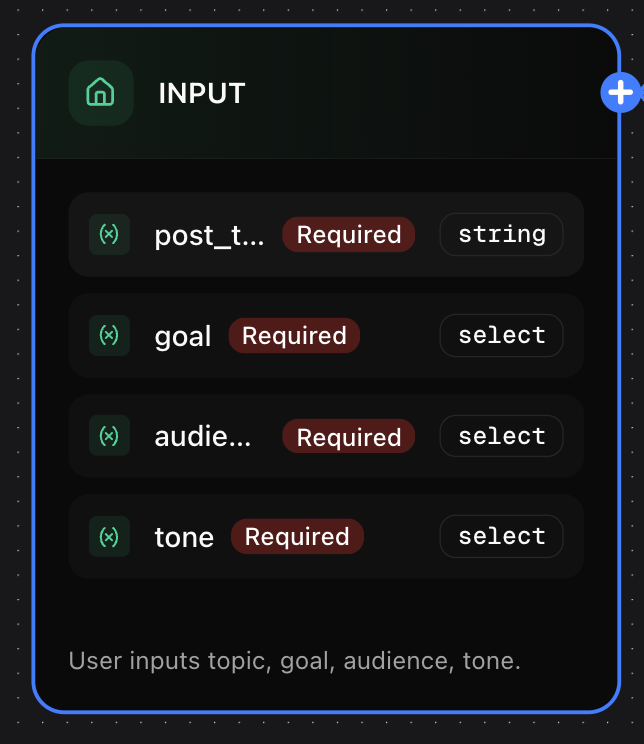
1. **Add Input Node**: Drag an Input Node onto your workflow canvas
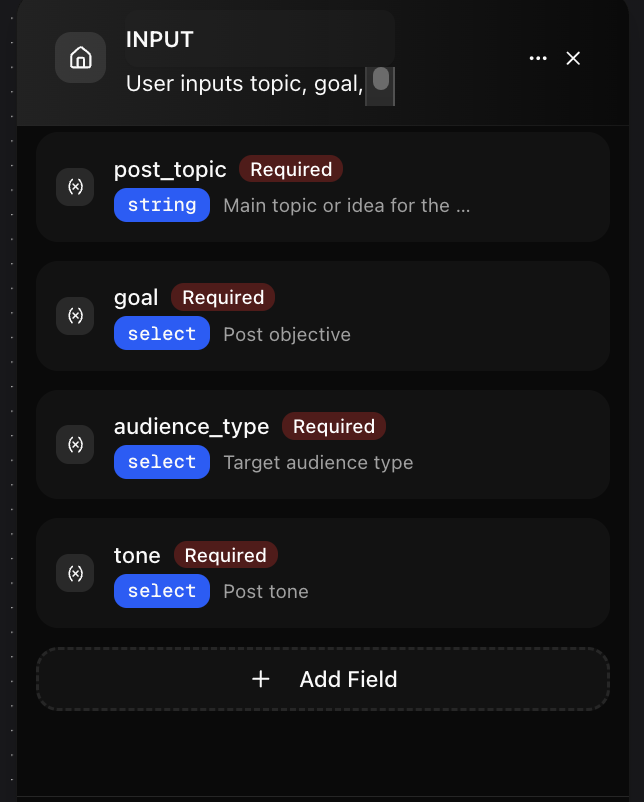
2. **Configure Input Parameters**:
* **Field Name**: `post_topic` (Type: Text, Required: Yes)
* **Field Name**: `tone` (Type: Dropdown, Options: Professional, Casual, Enthusiastic, Required: Yes)
* **Field Name**: `target_audience` (Type: Text, Required: No)
* **Field Name**: `key_points` (Type: Text, Required: No)
3. **Add Description**: "Provide the topic and tone for your LinkedIn post"
### Step 3: Create the Hook Generator LLM Node
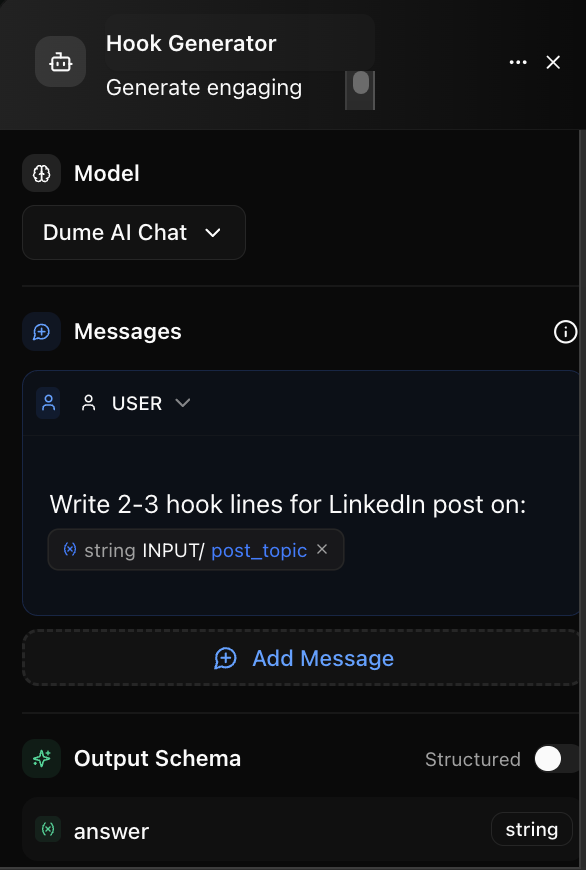
1. **Add LLM Node**: Place an LLM Node and connect it to the Input Node
2. **Node Configuration**:
* **Name**: "Hook Generator"
* **Model**: Select "Dume AI Chat"
* **Prompt**:
```
Create 2-3 engaging hook lines for a LinkedIn post about: {string INPUT/post_topic}
Tone: {string INPUT/tone}
Target Audience: {string INPUT/target_audience}
Make the hooks attention-grabbing and professional. Focus on creating curiosity or providing value.
```
3. **Output Schema**: Keep default (single string output)
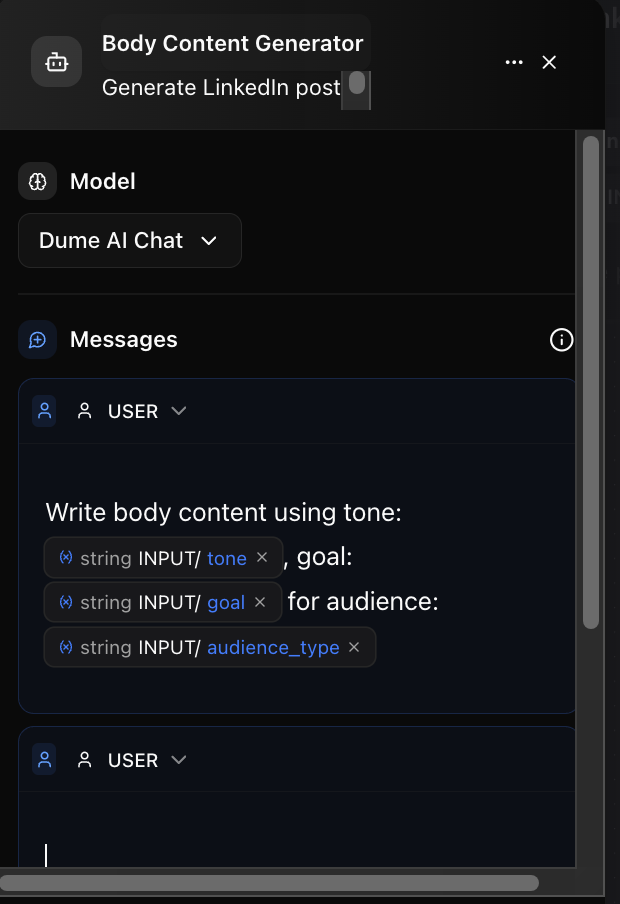
### Step 4: Create the Body Content Generator LLM Node
1. **Add Second LLM Node**: Place another LLM Node connected to the Input Node
2. **Node Configuration**:
* **Name**: "Body Content Generator"
* **Model**: Select "Dume AI Chat"
* **Prompt**:
```
Write engaging LinkedIn post body content about: {string INPUT/post_topic}
Tone: {string INPUT/tone}
Key Points to Include: {string INPUT/key_points}
Target Audience: {string INPUT/target_audience}
Make it informative, engaging, and suitable for LinkedIn's professional audience. Keep it concise but valuable.
```
3. **Output Schema**: Default string output
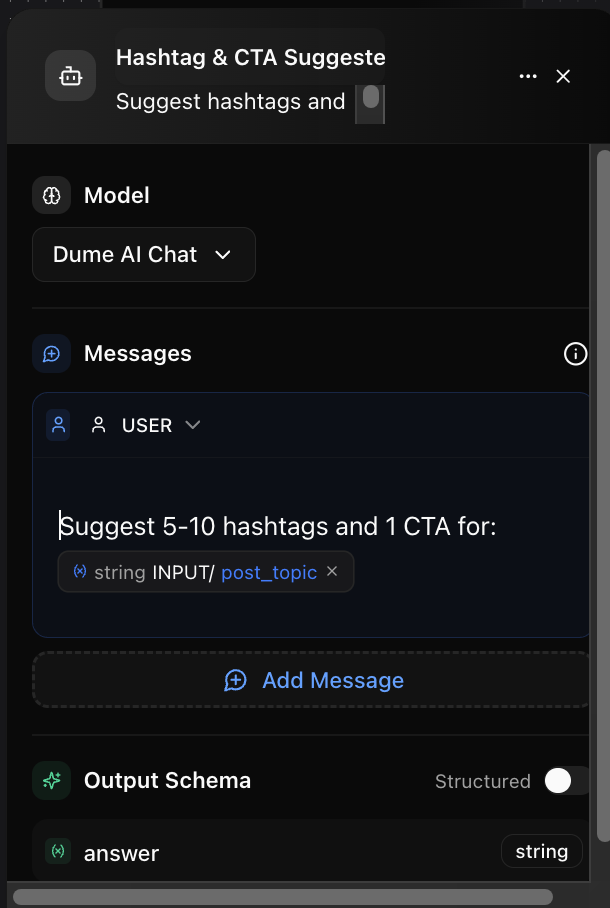
### Step 5: Create the Hashtag & CTA Generator LLM Node
1. **Add Third LLM Node**: Place another LLM Node connected to the Input Node
2. **Node Configuration**:
* **Name**: "Hashtag & CTA Generator"
* **Model**: Select "Dume AI Chat"
* **Prompt**:
```
Generate 5-8 relevant hashtags and a compelling call-to-action for a LinkedIn post about: {string INPUT/post_topic}
Tone: {string INPUT/tone}
Target Audience: {string INPUT/target_audience}
Format:
Hashtags: #hashtag1 #hashtag2 #hashtag3...
CTA: [Your call-to-action here]
```
3. **Output Schema**: Default string output
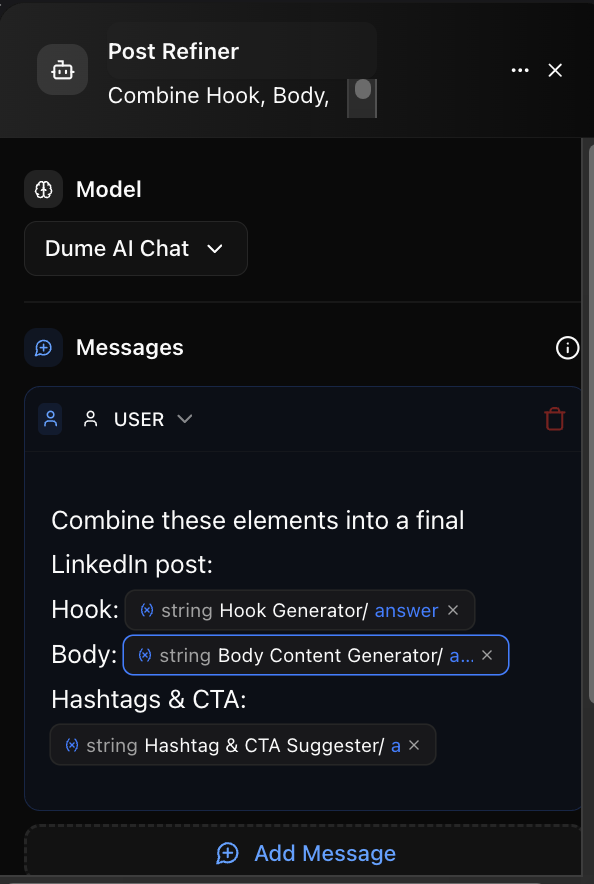
### Step 6: Create the Post Refiner LLM Node
1. **Add Fourth LLM Node**: Place an LLM Node that connects to all three previous LLM nodes
2. **Node Configuration**:
* **Name**: "Post Refiner"
* **Model**: Select "Dume AI Chat"
* **Prompt**:
```
Combine and refine these LinkedIn post components into a cohesive, professional post:
Hook: {string Hook_Generator/answer}
Body: {string Body_Content_Generator/answer}
Hashtags & CTA: {string Hashtag_CTA_Generator/answer}
Requirements:
- Ensure smooth flow between sections
- Optimize for LinkedIn's algorithm
- Keep professional tone
- Make sure the post is engaging and valuable
- Final post should be ready to publish
```
3. **Output Schema**: Default string output
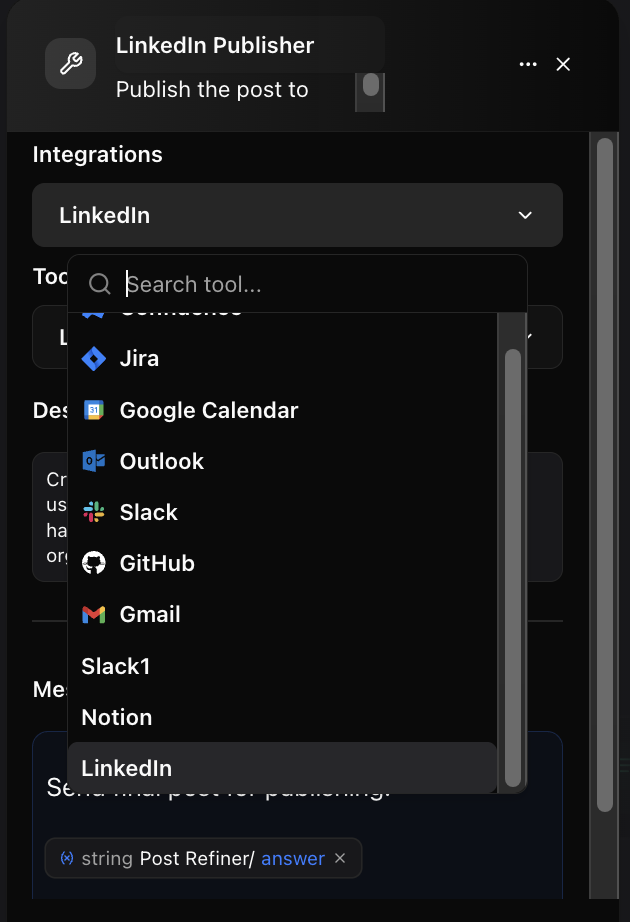
### Step 7: Add the LinkedIn Publishing Tool Node
1. **Add Tool Node**: Place a Tool Node connected to the Post Refiner
2. **Node Configuration**:
* **Name**: "LinkedIn Publisher"
* **Integration**: Select your configured LinkedIn MCP Server
* **Tool**: Choose "Create LinkedIn Post" (or equivalent tool name)
* **Message/Instructions**:
```
Publish this LinkedIn post: {string Post_Refiner/answer}
```
3. **Parameters**: The tool should automatically map the post content from the Post Refiner output
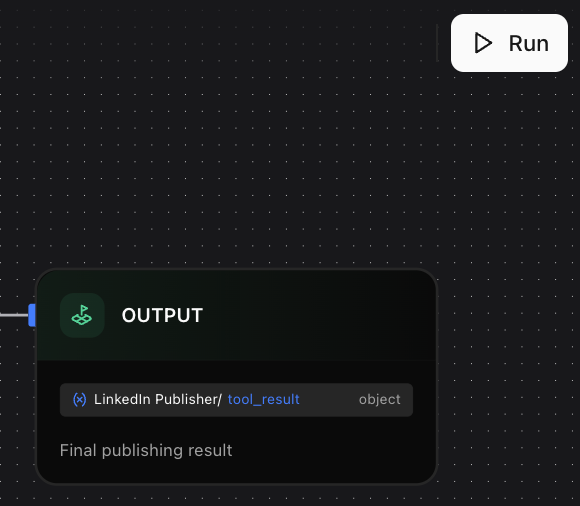
### Step 8: Add the Output Node
1. **Add Output Node**: Place an Output Node connected to the Tool Node
2. **Configure Output Variables**:
* **Field Name**: `original_topic` → Map to `{string INPUT/post_topic}`
* **Field Name**: `generated_post` → Map to `{string Post_Refiner/answer}`
* **Field Name**: `publish_result` → Map to `{string LinkedIn_Publisher/result}`
* **Field Name**: `post_url` → Map to `{string LinkedIn_Publisher/post_url}` (if available)
3. **Description**: "LinkedIn post generation and publishing results"
## Testing Your Workflow
### Step 9: Test the Complete Flow
1. **Save Your Workflow**: Give it a descriptive name like "LinkedIn Post Creator". It also auto saves in every 10 seconds.
2. **Test Run**: Click the test button and provide sample inputs:
* **Post Topic**: "The future of AI in marketing"
* **Tone**: "Professional"
* **Target Audience**: "Marketing professionals and business owners"
* **Key Points**: "Efficiency, personalization, data-driven insights"
3. **Verify Results**: Check that each node produces expected outputs and the final LinkedIn post is published successfully on the LinkedIn page.
## Pro Tips
* **Add Note Nodes**: Include documentation for complex logic or team collaboration
* **Error Handling**: Consider adding Condition Nodes to handle potential API failures
* **Customization**: Adjust prompts based on your brand voice and industry
* **Testing**: Always test with different topics and tones before deploying
Your LinkedIn post creation workflow is now complete and ready to automate your content creation process!
 2. **Add LinkedIn Integration**: Follow the detailed setup instructions at [https://docs.dume.ai/mcp\_server](https://docs.dume.ai/mcp_server) to connect LinkdIn MCP remote server from Composio.
3. **Authenticate Your Account**: Complete the OAuth flow to connect your LinkedIn profile
4. **Test Connection**: Verify that the LinkedIn MCP server is properly connected and accessible
Once your LinkedIn MCP server is configured, you're ready to build the workflow.
## Building the LinkedIn Post Workflow
### Step 2: Create the Input Node
1. **Add Input Node**: Drag an Input Node onto your workflow canvas
2. **Add LinkedIn Integration**: Follow the detailed setup instructions at [https://docs.dume.ai/mcp\_server](https://docs.dume.ai/mcp_server) to connect LinkdIn MCP remote server from Composio.
3. **Authenticate Your Account**: Complete the OAuth flow to connect your LinkedIn profile
4. **Test Connection**: Verify that the LinkedIn MCP server is properly connected and accessible
Once your LinkedIn MCP server is configured, you're ready to build the workflow.
## Building the LinkedIn Post Workflow
### Step 2: Create the Input Node
1. **Add Input Node**: Drag an Input Node onto your workflow canvas
 2. **Configure Input Parameters**:
* **Field Name**: `post_topic` (Type: Text, Required: Yes)
* **Field Name**: `tone` (Type: Dropdown, Options: Professional, Casual, Enthusiastic, Required: Yes)
* **Field Name**: `target_audience` (Type: Text, Required: No)
* **Field Name**: `key_points` (Type: Text, Required: No)
2. **Configure Input Parameters**:
* **Field Name**: `post_topic` (Type: Text, Required: Yes)
* **Field Name**: `tone` (Type: Dropdown, Options: Professional, Casual, Enthusiastic, Required: Yes)
* **Field Name**: `target_audience` (Type: Text, Required: No)
* **Field Name**: `key_points` (Type: Text, Required: No)
 3. **Add Description**: "Provide the topic and tone for your LinkedIn post"
### Step 3: Create the Hook Generator LLM Node
1. **Add LLM Node**: Place an LLM Node and connect it to the Input Node
2. **Node Configuration**:
* **Name**: "Hook Generator"
* **Model**: Select "Dume AI Chat"
* **Prompt**:
```
Create 2-3 engaging hook lines for a LinkedIn post about: {string INPUT/post_topic}
Tone: {string INPUT/tone}
Target Audience: {string INPUT/target_audience}
Make the hooks attention-grabbing and professional. Focus on creating curiosity or providing value.
```
3. **Output Schema**: Keep default (single string output)
3. **Add Description**: "Provide the topic and tone for your LinkedIn post"
### Step 3: Create the Hook Generator LLM Node
1. **Add LLM Node**: Place an LLM Node and connect it to the Input Node
2. **Node Configuration**:
* **Name**: "Hook Generator"
* **Model**: Select "Dume AI Chat"
* **Prompt**:
```
Create 2-3 engaging hook lines for a LinkedIn post about: {string INPUT/post_topic}
Tone: {string INPUT/tone}
Target Audience: {string INPUT/target_audience}
Make the hooks attention-grabbing and professional. Focus on creating curiosity or providing value.
```
3. **Output Schema**: Keep default (single string output)
 ### Step 4: Create the Body Content Generator LLM Node
1. **Add Second LLM Node**: Place another LLM Node connected to the Input Node
2. **Node Configuration**:
* **Name**: "Body Content Generator"
* **Model**: Select "Dume AI Chat"
* **Prompt**:
```
Write engaging LinkedIn post body content about: {string INPUT/post_topic}
Tone: {string INPUT/tone}
Key Points to Include: {string INPUT/key_points}
Target Audience: {string INPUT/target_audience}
Make it informative, engaging, and suitable for LinkedIn's professional audience. Keep it concise but valuable.
```
3. **Output Schema**: Default string output
### Step 4: Create the Body Content Generator LLM Node
1. **Add Second LLM Node**: Place another LLM Node connected to the Input Node
2. **Node Configuration**:
* **Name**: "Body Content Generator"
* **Model**: Select "Dume AI Chat"
* **Prompt**:
```
Write engaging LinkedIn post body content about: {string INPUT/post_topic}
Tone: {string INPUT/tone}
Key Points to Include: {string INPUT/key_points}
Target Audience: {string INPUT/target_audience}
Make it informative, engaging, and suitable for LinkedIn's professional audience. Keep it concise but valuable.
```
3. **Output Schema**: Default string output
 ### Step 5: Create the Hashtag & CTA Generator LLM Node
1. **Add Third LLM Node**: Place another LLM Node connected to the Input Node
2. **Node Configuration**:
* **Name**: "Hashtag & CTA Generator"
* **Model**: Select "Dume AI Chat"
* **Prompt**:
```
Generate 5-8 relevant hashtags and a compelling call-to-action for a LinkedIn post about: {string INPUT/post_topic}
Tone: {string INPUT/tone}
Target Audience: {string INPUT/target_audience}
Format:
Hashtags: #hashtag1 #hashtag2 #hashtag3...
CTA: [Your call-to-action here]
```
3. **Output Schema**: Default string output
### Step 5: Create the Hashtag & CTA Generator LLM Node
1. **Add Third LLM Node**: Place another LLM Node connected to the Input Node
2. **Node Configuration**:
* **Name**: "Hashtag & CTA Generator"
* **Model**: Select "Dume AI Chat"
* **Prompt**:
```
Generate 5-8 relevant hashtags and a compelling call-to-action for a LinkedIn post about: {string INPUT/post_topic}
Tone: {string INPUT/tone}
Target Audience: {string INPUT/target_audience}
Format:
Hashtags: #hashtag1 #hashtag2 #hashtag3...
CTA: [Your call-to-action here]
```
3. **Output Schema**: Default string output
 ### Step 6: Create the Post Refiner LLM Node
1. **Add Fourth LLM Node**: Place an LLM Node that connects to all three previous LLM nodes
2. **Node Configuration**:
* **Name**: "Post Refiner"
* **Model**: Select "Dume AI Chat"
* **Prompt**:
```
Combine and refine these LinkedIn post components into a cohesive, professional post:
Hook: {string Hook_Generator/answer}
Body: {string Body_Content_Generator/answer}
Hashtags & CTA: {string Hashtag_CTA_Generator/answer}
Requirements:
- Ensure smooth flow between sections
- Optimize for LinkedIn's algorithm
- Keep professional tone
- Make sure the post is engaging and valuable
- Final post should be ready to publish
```
3. **Output Schema**: Default string output
### Step 6: Create the Post Refiner LLM Node
1. **Add Fourth LLM Node**: Place an LLM Node that connects to all three previous LLM nodes
2. **Node Configuration**:
* **Name**: "Post Refiner"
* **Model**: Select "Dume AI Chat"
* **Prompt**:
```
Combine and refine these LinkedIn post components into a cohesive, professional post:
Hook: {string Hook_Generator/answer}
Body: {string Body_Content_Generator/answer}
Hashtags & CTA: {string Hashtag_CTA_Generator/answer}
Requirements:
- Ensure smooth flow between sections
- Optimize for LinkedIn's algorithm
- Keep professional tone
- Make sure the post is engaging and valuable
- Final post should be ready to publish
```
3. **Output Schema**: Default string output
 ### Step 7: Add the LinkedIn Publishing Tool Node
1. **Add Tool Node**: Place a Tool Node connected to the Post Refiner
### Step 7: Add the LinkedIn Publishing Tool Node
1. **Add Tool Node**: Place a Tool Node connected to the Post Refiner
 2. **Node Configuration**:
* **Name**: "LinkedIn Publisher"
* **Integration**: Select your configured LinkedIn MCP Server
* **Tool**: Choose "Create LinkedIn Post" (or equivalent tool name)
* **Message/Instructions**:
```
Publish this LinkedIn post: {string Post_Refiner/answer}
```
3. **Parameters**: The tool should automatically map the post content from the Post Refiner output
### Step 8: Add the Output Node
1. **Add Output Node**: Place an Output Node connected to the Tool Node
2. **Configure Output Variables**:
* **Field Name**: `original_topic` → Map to `{string INPUT/post_topic}`
* **Field Name**: `generated_post` → Map to `{string Post_Refiner/answer}`
* **Field Name**: `publish_result` → Map to `{string LinkedIn_Publisher/result}`
* **Field Name**: `post_url` → Map to `{string LinkedIn_Publisher/post_url}` (if available)
3. **Description**: "LinkedIn post generation and publishing results"
## Testing Your Workflow
### Step 9: Test the Complete Flow
1. **Save Your Workflow**: Give it a descriptive name like "LinkedIn Post Creator". It also auto saves in every 10 seconds.
2. **Test Run**: Click the test button and provide sample inputs:
* **Post Topic**: "The future of AI in marketing"
* **Tone**: "Professional"
* **Target Audience**: "Marketing professionals and business owners"
* **Key Points**: "Efficiency, personalization, data-driven insights"
2. **Node Configuration**:
* **Name**: "LinkedIn Publisher"
* **Integration**: Select your configured LinkedIn MCP Server
* **Tool**: Choose "Create LinkedIn Post" (or equivalent tool name)
* **Message/Instructions**:
```
Publish this LinkedIn post: {string Post_Refiner/answer}
```
3. **Parameters**: The tool should automatically map the post content from the Post Refiner output
### Step 8: Add the Output Node
1. **Add Output Node**: Place an Output Node connected to the Tool Node
2. **Configure Output Variables**:
* **Field Name**: `original_topic` → Map to `{string INPUT/post_topic}`
* **Field Name**: `generated_post` → Map to `{string Post_Refiner/answer}`
* **Field Name**: `publish_result` → Map to `{string LinkedIn_Publisher/result}`
* **Field Name**: `post_url` → Map to `{string LinkedIn_Publisher/post_url}` (if available)
3. **Description**: "LinkedIn post generation and publishing results"
## Testing Your Workflow
### Step 9: Test the Complete Flow
1. **Save Your Workflow**: Give it a descriptive name like "LinkedIn Post Creator". It also auto saves in every 10 seconds.
2. **Test Run**: Click the test button and provide sample inputs:
* **Post Topic**: "The future of AI in marketing"
* **Tone**: "Professional"
* **Target Audience**: "Marketing professionals and business owners"
* **Key Points**: "Efficiency, personalization, data-driven insights"
 3. **Verify Results**: Check that each node produces expected outputs and the final LinkedIn post is published successfully on the LinkedIn page.
## Pro Tips
* **Add Note Nodes**: Include documentation for complex logic or team collaboration
* **Error Handling**: Consider adding Condition Nodes to handle potential API failures
* **Customization**: Adjust prompts based on your brand voice and industry
* **Testing**: Always test with different topics and tones before deploying
Your LinkedIn post creation workflow is now complete and ready to automate your content creation process!
3. **Verify Results**: Check that each node produces expected outputs and the final LinkedIn post is published successfully on the LinkedIn page.
## Pro Tips
* **Add Note Nodes**: Include documentation for complex logic or team collaboration
* **Error Handling**: Consider adding Condition Nodes to handle potential API failures
* **Customization**: Adjust prompts based on your brand voice and industry
* **Testing**: Always test with different topics and tones before deploying
Your LinkedIn post creation workflow is now complete and ready to automate your content creation process!